Turning a Garage into Living Space Part 8
Series Wiring
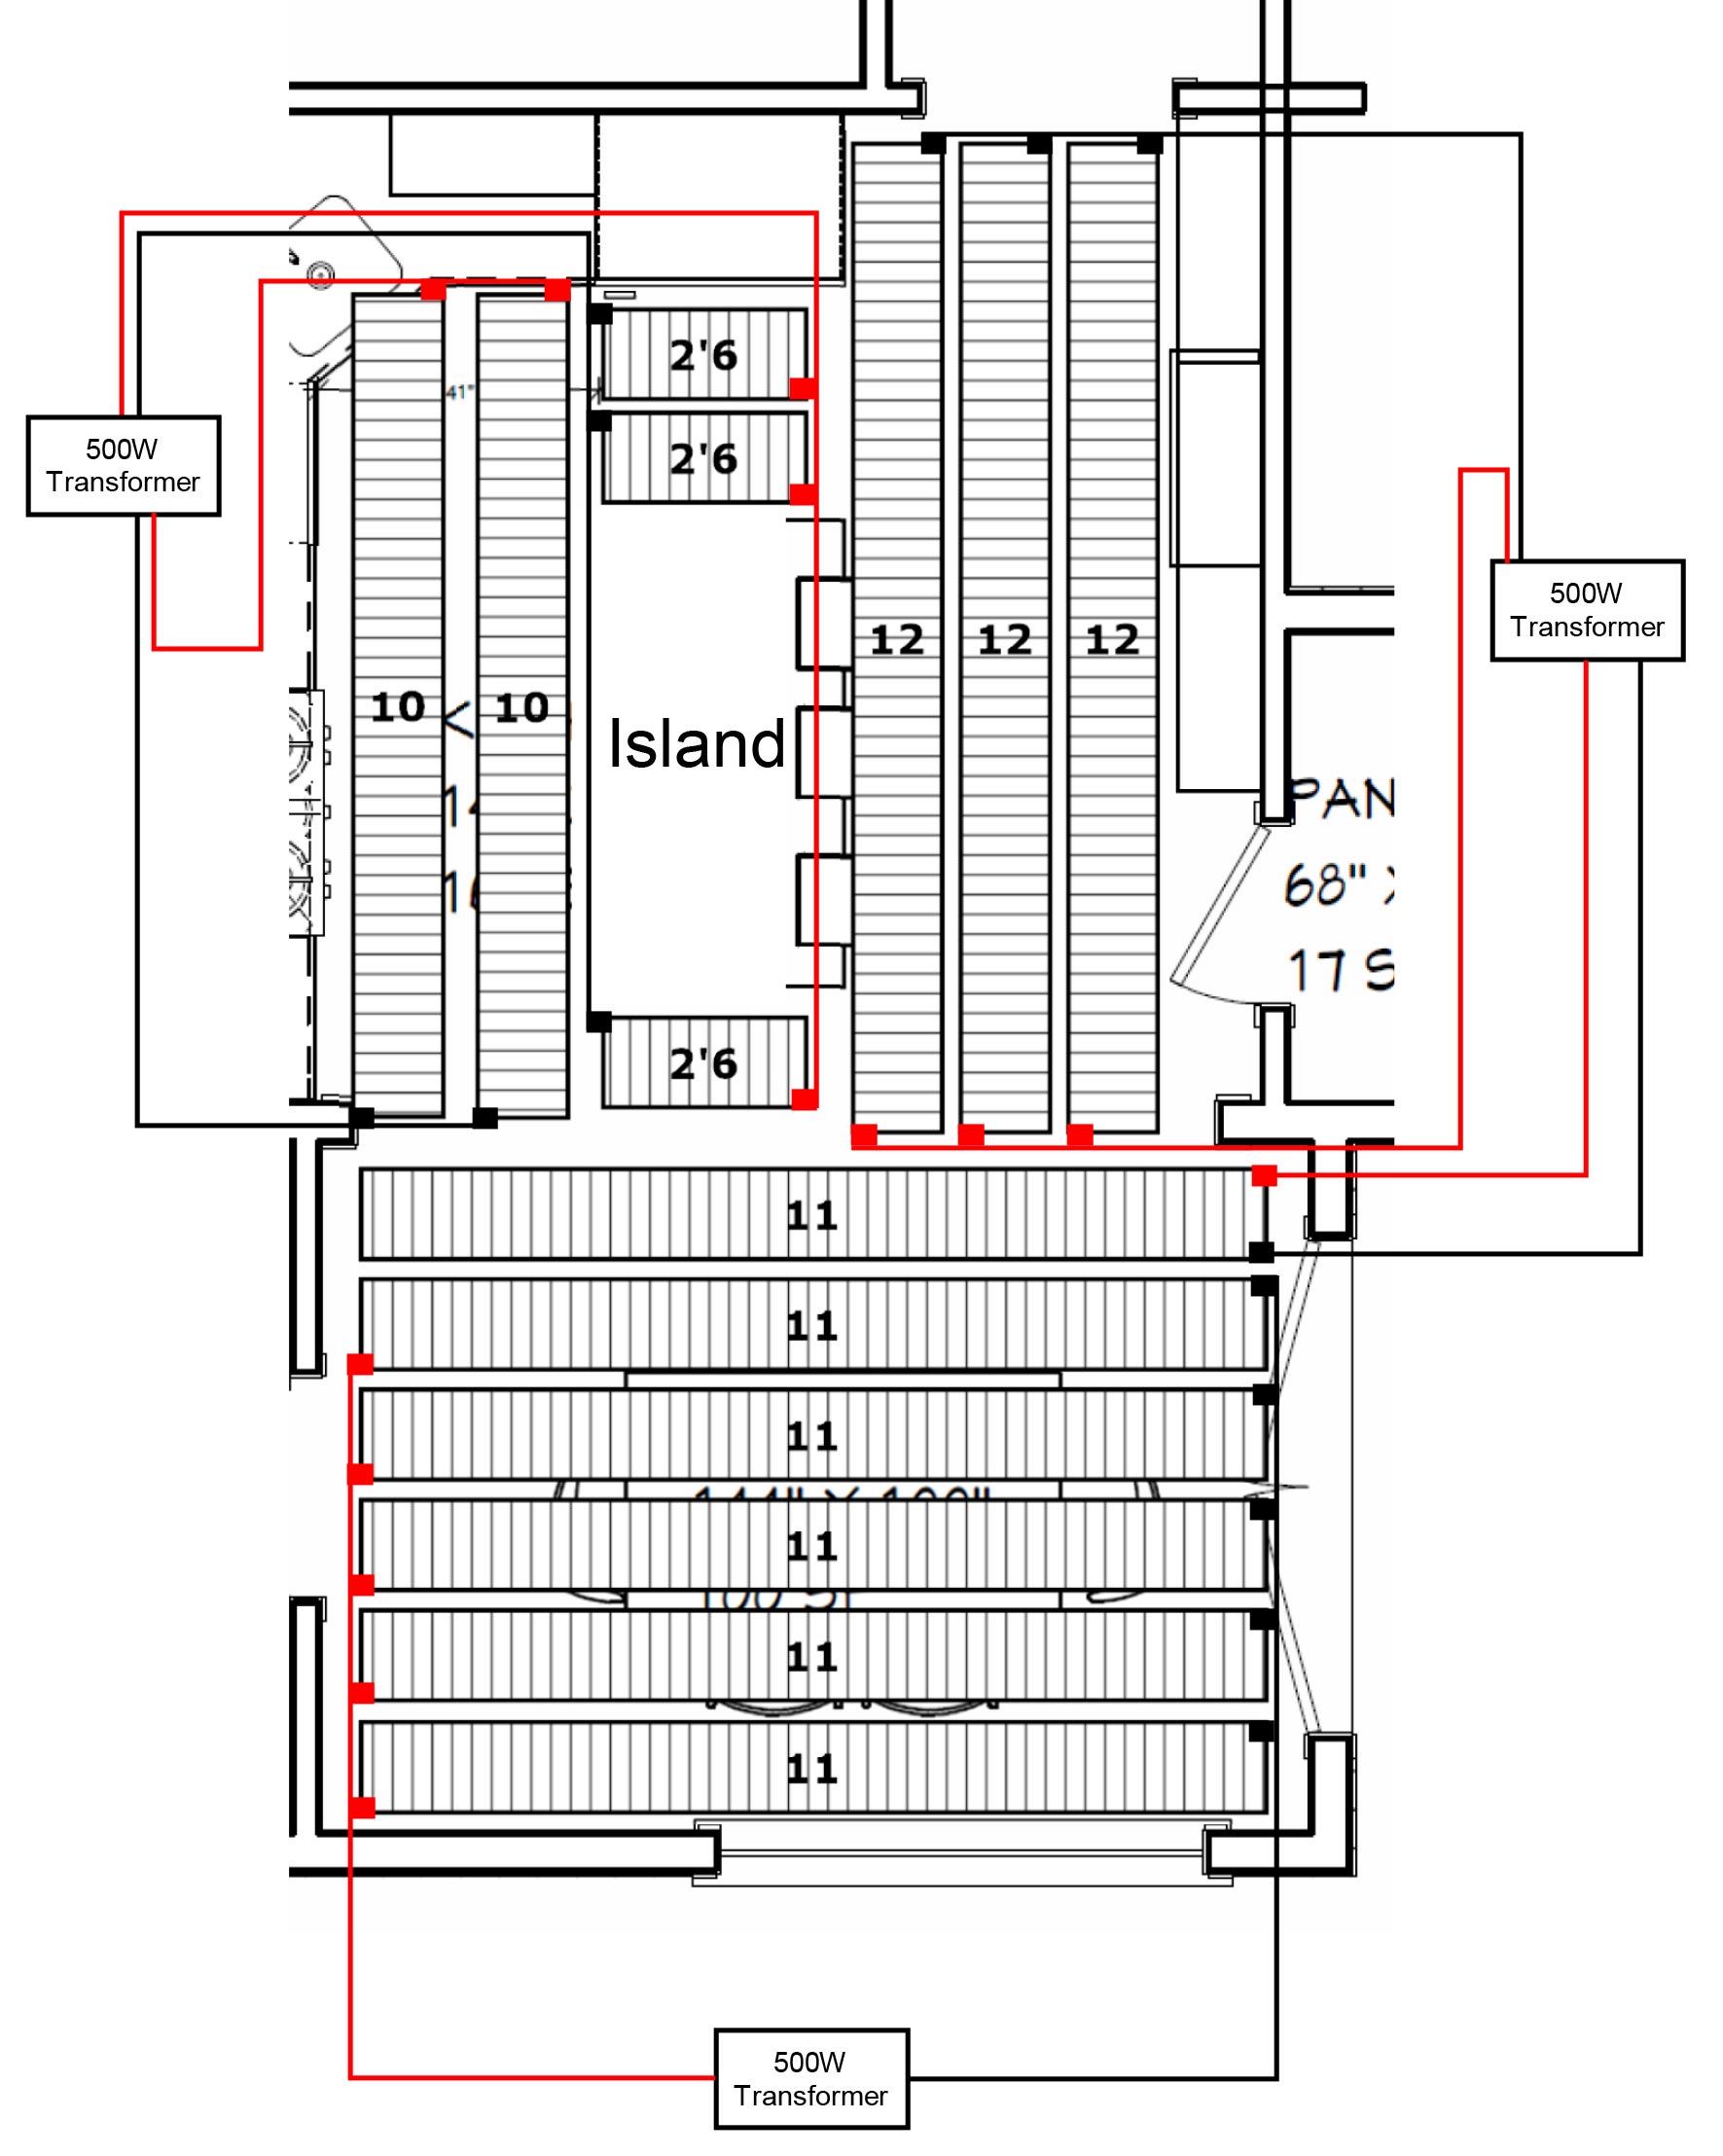
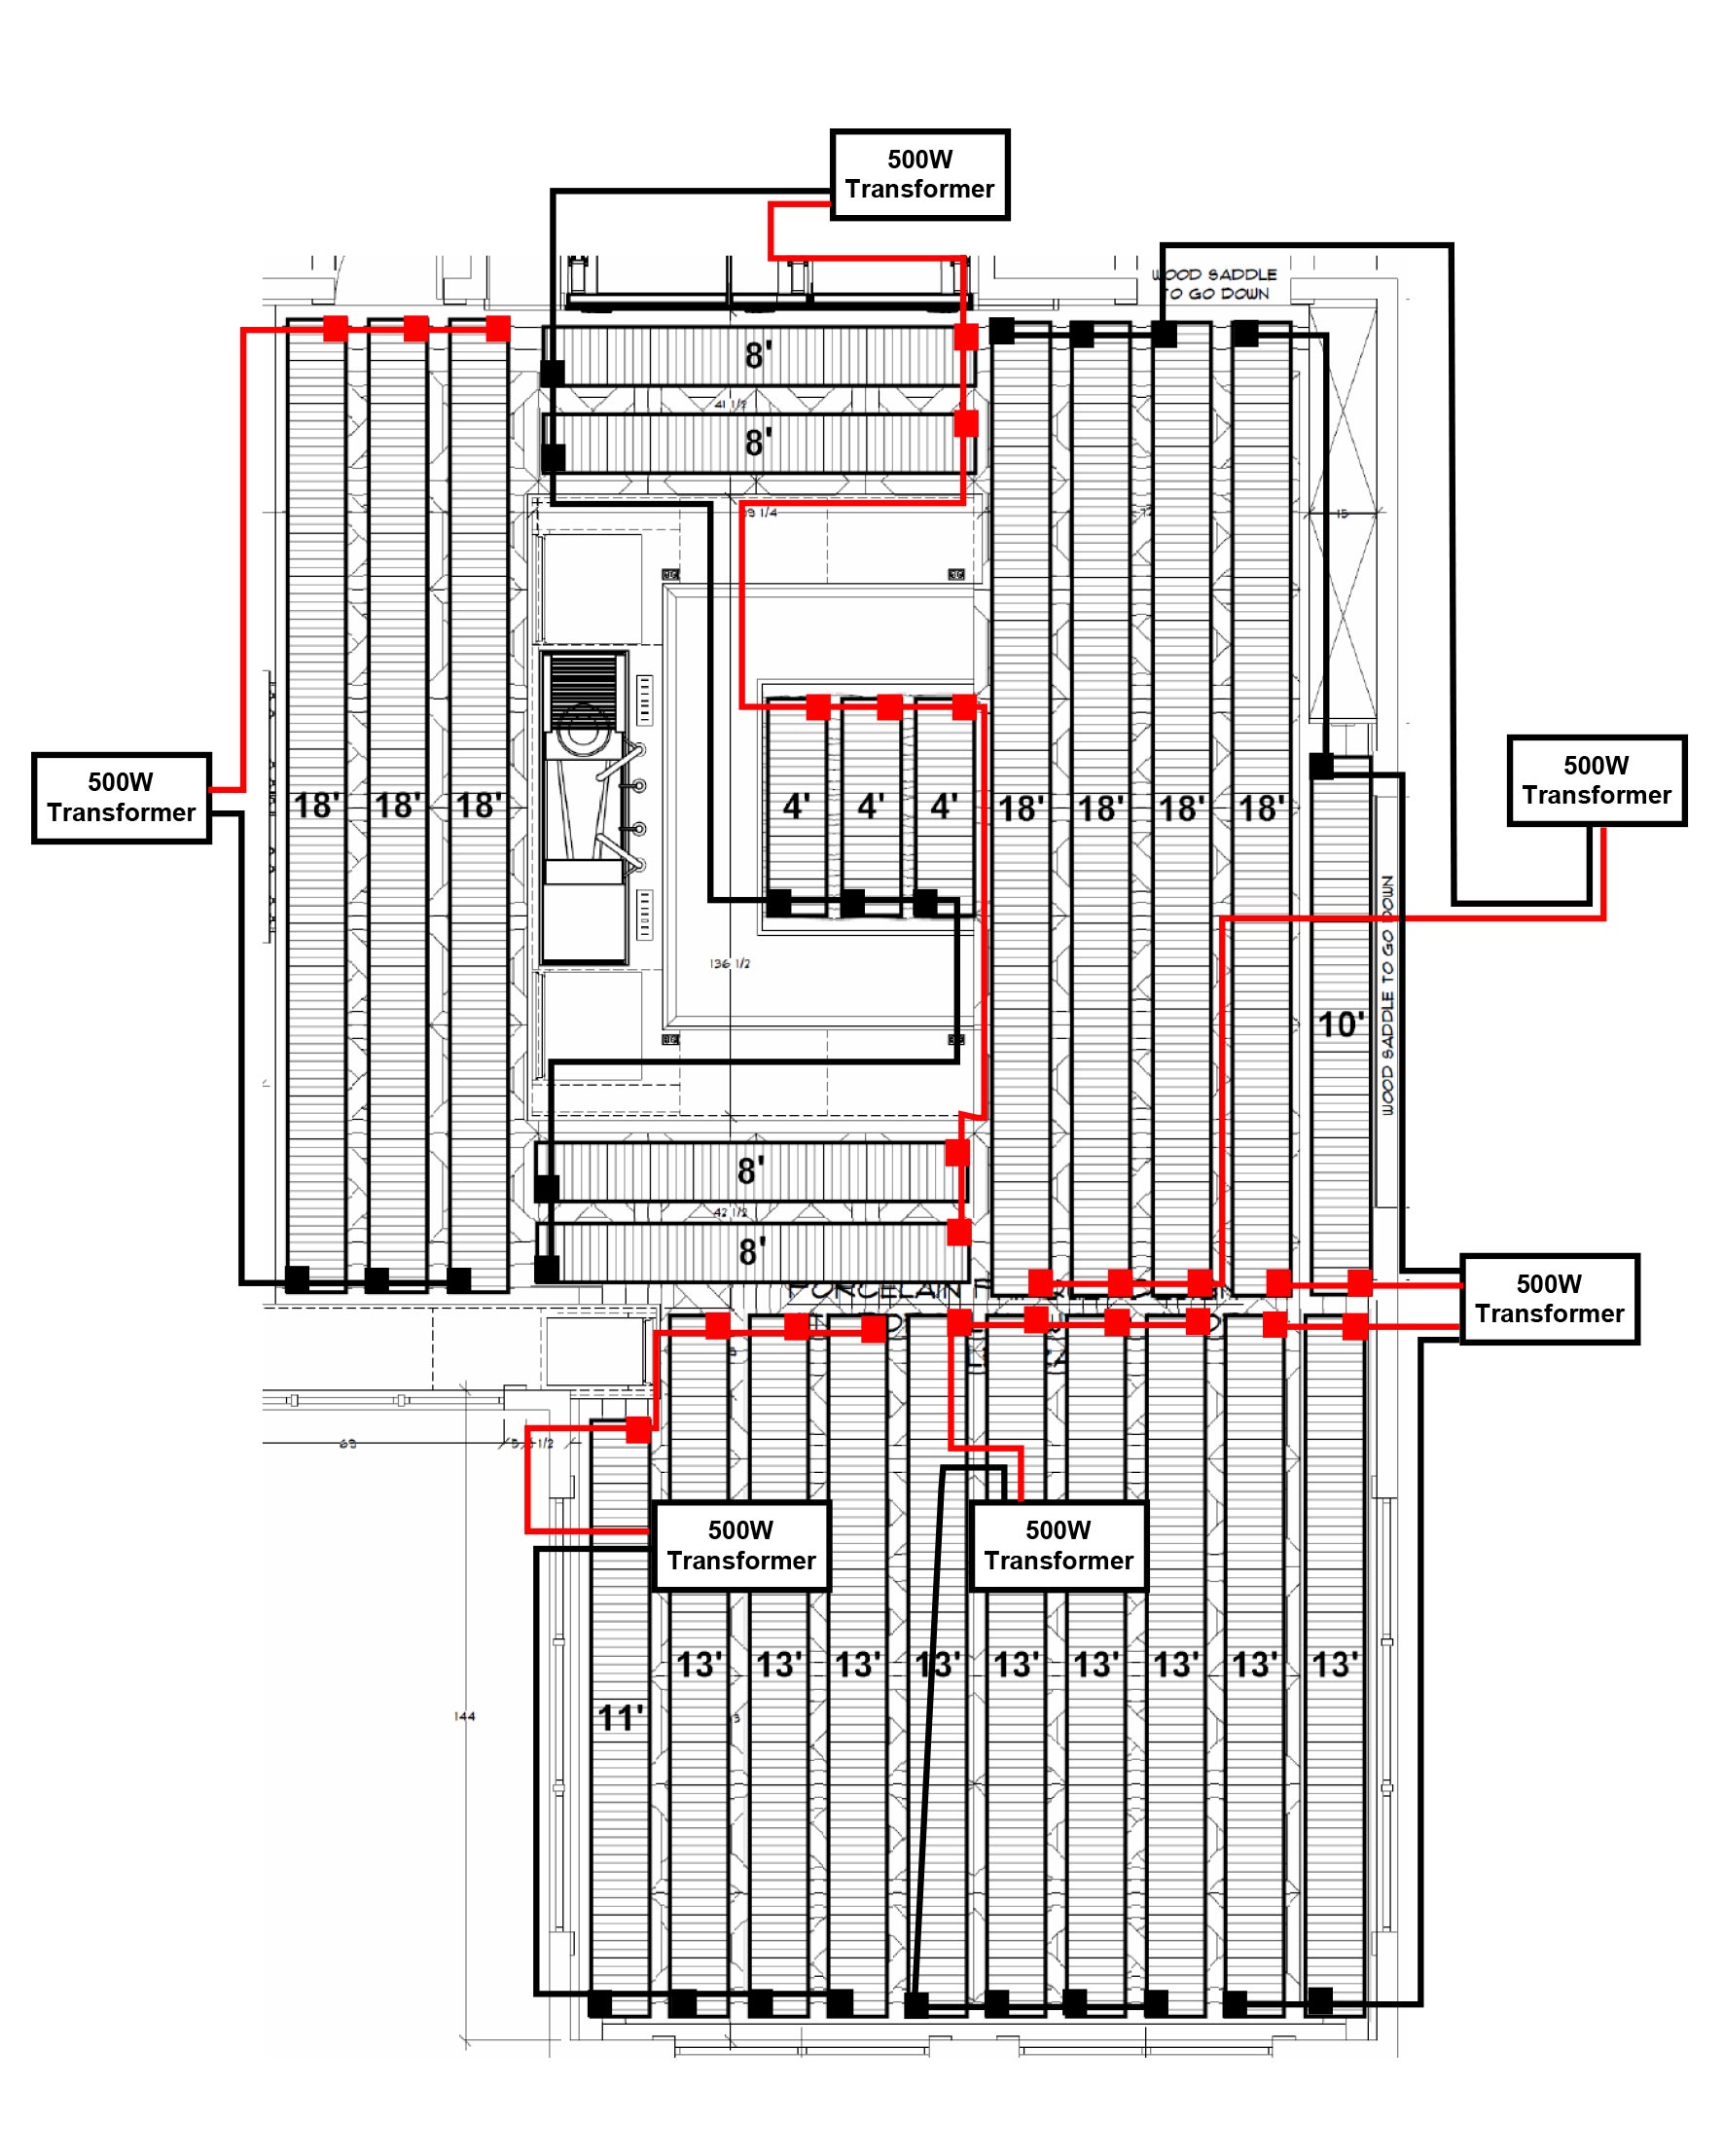
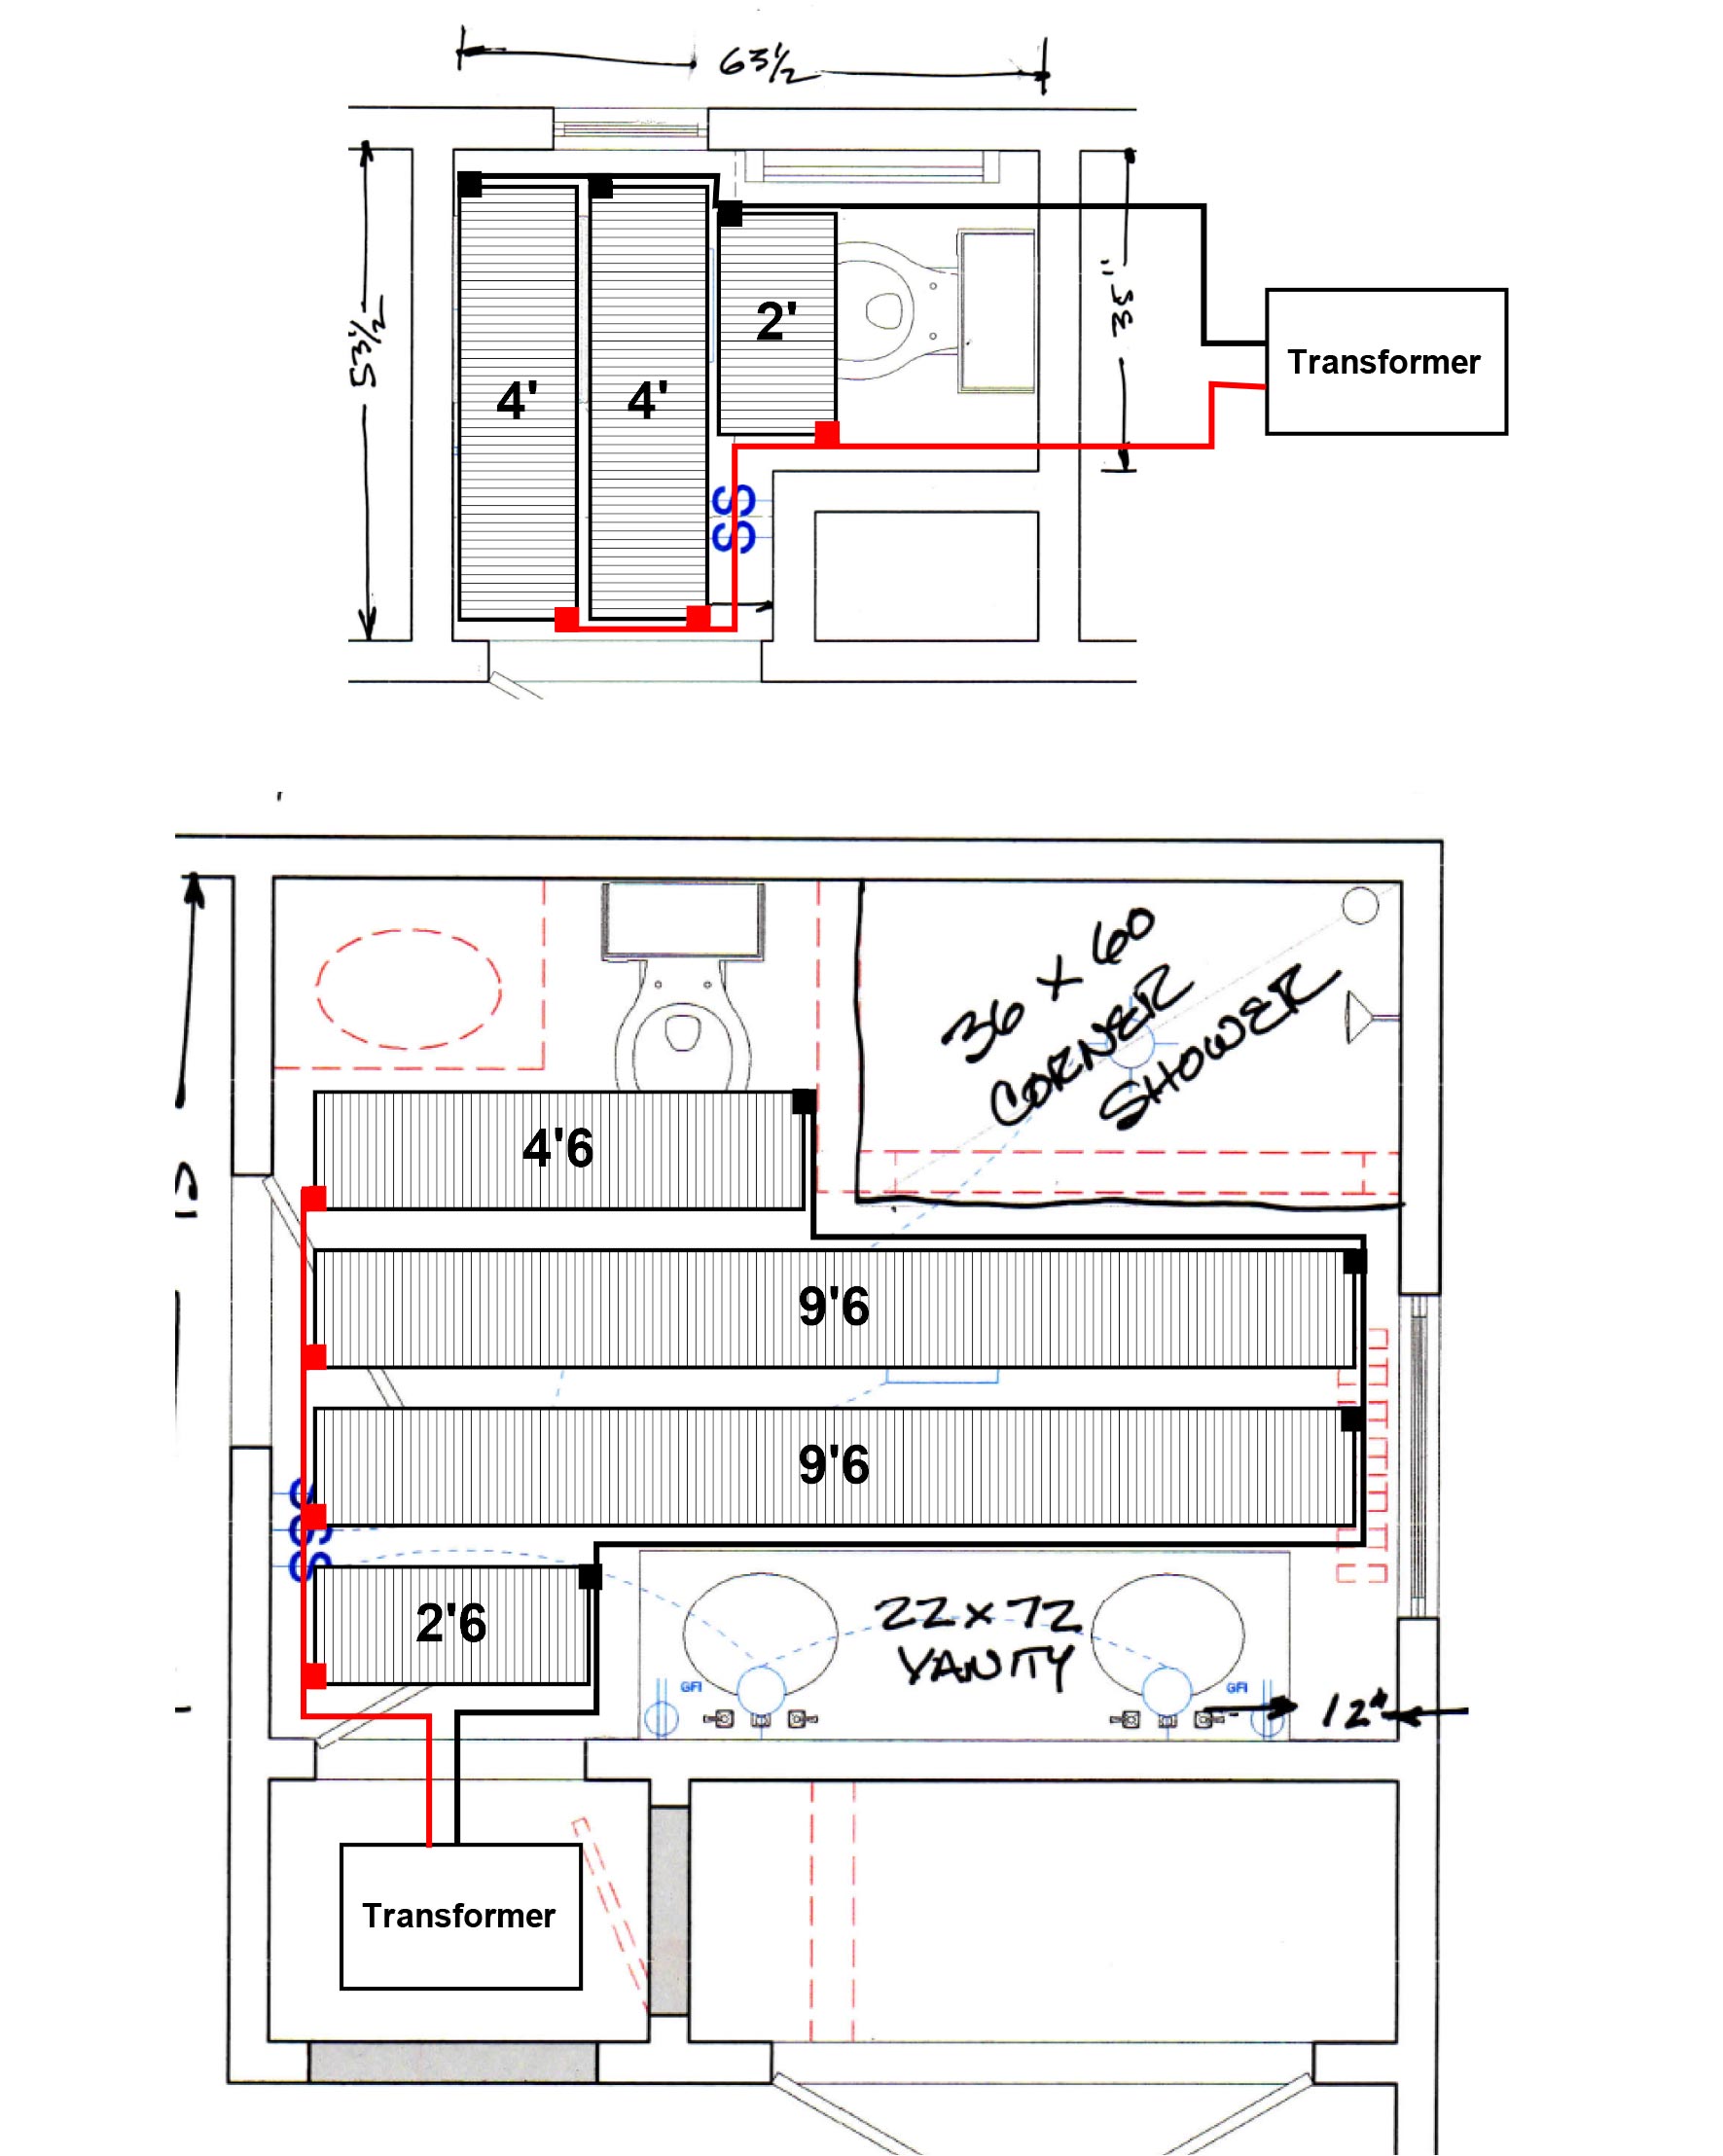
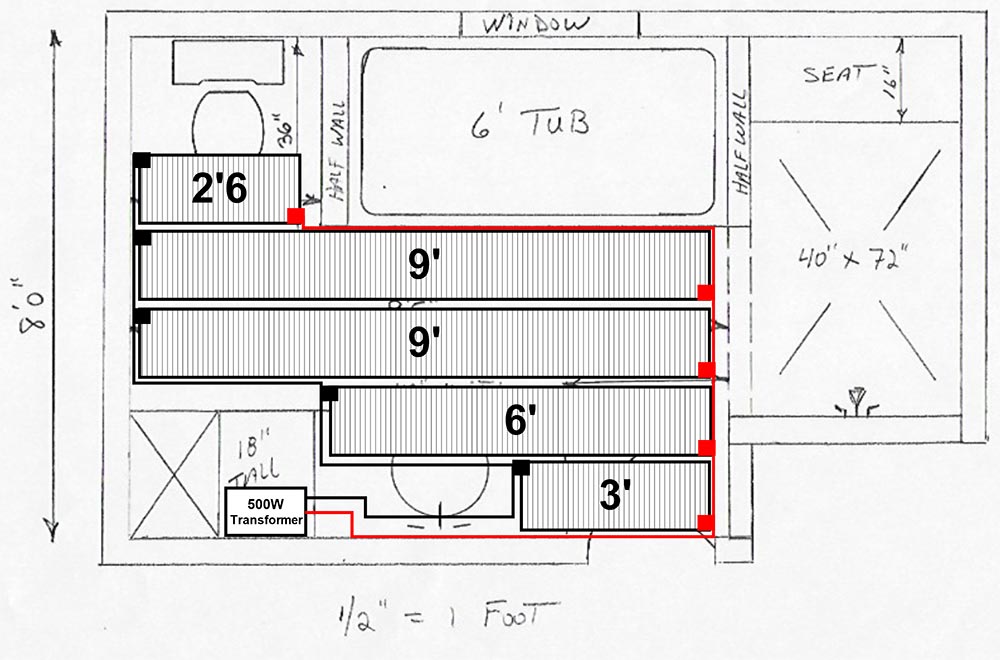
Parallel Wiring
You must NOT use wire lath or any type of metal mesh underneath or on top of this product.
Metallic mesh of any kind will short out the system causing it to malfunction.
To see examples of compatible materials visit our Cut Sheet Installation Guidelines page.
Instructions
1. Cut the heating element to desired lengths.
2. Put the cut elements in place on the floor. Do not space heating elements more than 4 inches apart. You can put the elements as close together as you like as long as they don’t touch.
3. Using the provided silver connectors and 14 gage wires, strip the wire and insert it to the crimp. Using standard plyers crimp the wire and connector together.
4. Take the wired connector and center it over the buss braid located ½ inch front each side of the heating element. Crimp the connector on to the heating element, using standard plyers. Use red wire on one side, black on the other.
5. Repeat this method and connect all the heating elements to the transformer. Keep the red wire and black wire on their respective sides.
6. Mount your transformer near an outlet and connect the two wires that come out of the transformer, one to the black wires and one to the red wires.
7. Follow this procedure for each element.
8. After the wiring is complete, plug in the transformer and test the system.
9. Go to the last element run and put your tester on the connector. You should have 23v. If you do, continue testing every connection to make sure they all are at looking for 23v. When complete tape over each connection with electrical tape covering connection completely.
10. Finally, staple, tape, or nail down the heating element to the substrate. Be careful not to hit the buss braid in the element. When complete you are ready to lay the floor.
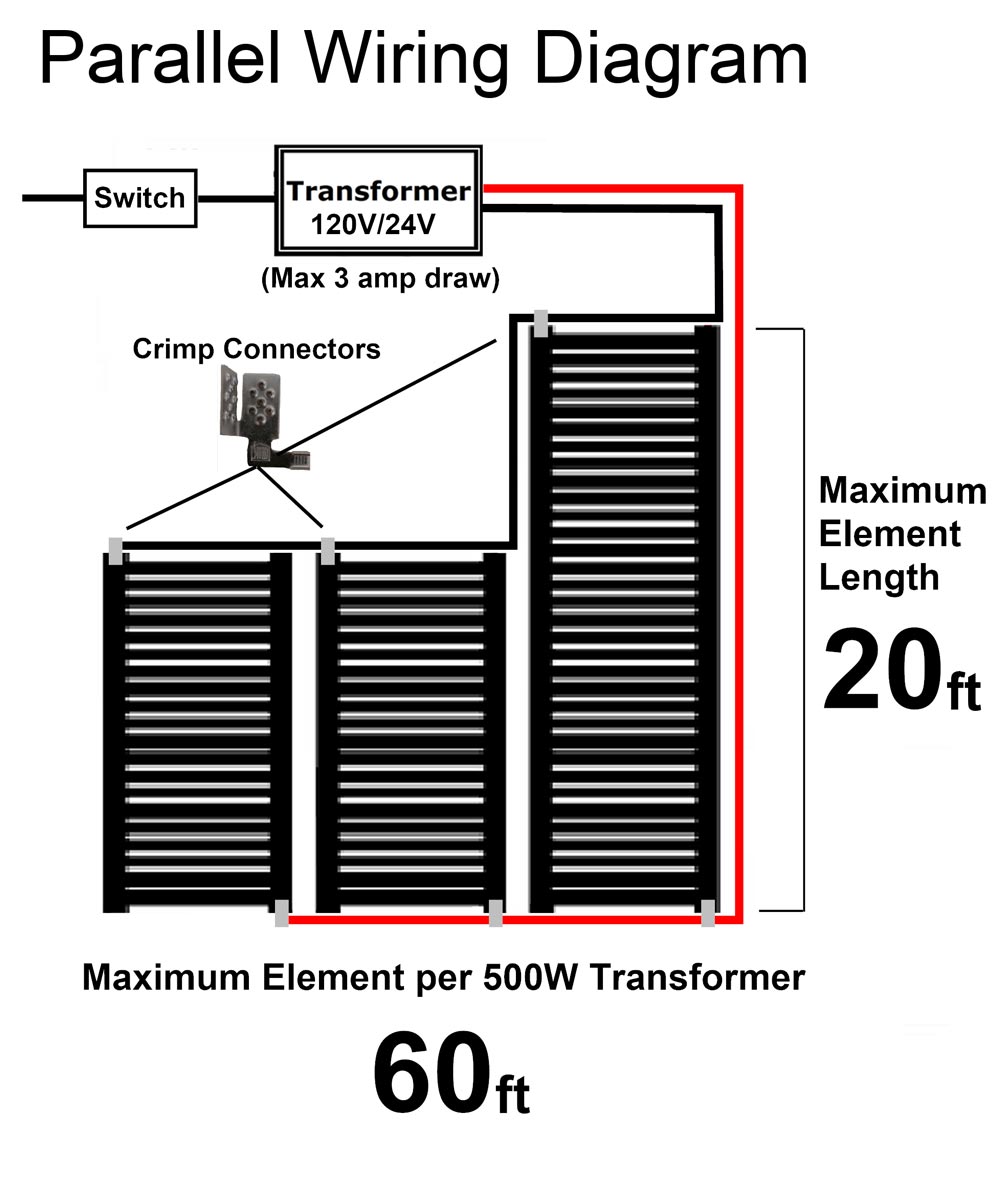
Parallel Wiring Examples
| Element Length* | Power Supply (24V) | Watts | Amps 120V |
| 28ft per 250W transformer | 250W |
218 |
1.4 |
| 60ft per 500W transformer | 500W |
468 |
3.0 |
| * Maximum total element length per power supply. |
| Element to Transformer Maximum Wire Length | Max Length | |||
| 14 AWG |
15 ft |
|||
| 12 AWG |
25 ft |
|||
| 10 AWG |
35 ft |
|||
| *All kits are supplied with 14 gauge wire |
- TECHNICAL SPECIFICATIONS
- FEATURES
How to Install Chill Out from Below the flooring:
1) Remove or cut off any nails protruding the subfloor. Cover the end with electrical tape.
2) Cut the desired length of the heating element
3) Staple the heating element to the underside of the flooring.
4) Wire the heating mat with supplied connect clips, using the red wire on one side and the black on the other. (This method will eliminate confusion leading to mistakes during the final hook-up.)
5) You can connect mat 1 to mat 2, Never exceeding 21 feet of total heating mat length. If your install has more than 21 feet of mat start another run leading to the transformer.
6) Next finish your wiring to the transformer.
7) Test all connections. You should get 24 volts (or more) at each connection.
8) Do not go any further if you can not get 24 volts at each connection stop and call 877 813 8656.
9) Next using hard foam board insulation, press the foam tight against the heating element, using roofing nails, secure the hard foam. Stay away from the edges of the heating element to avoid the bus braid running down each side of the heating element.
10) Use a can of spray foam along the edges of the hard foam to make them air-tight. Do not get spray form on the heating elements.
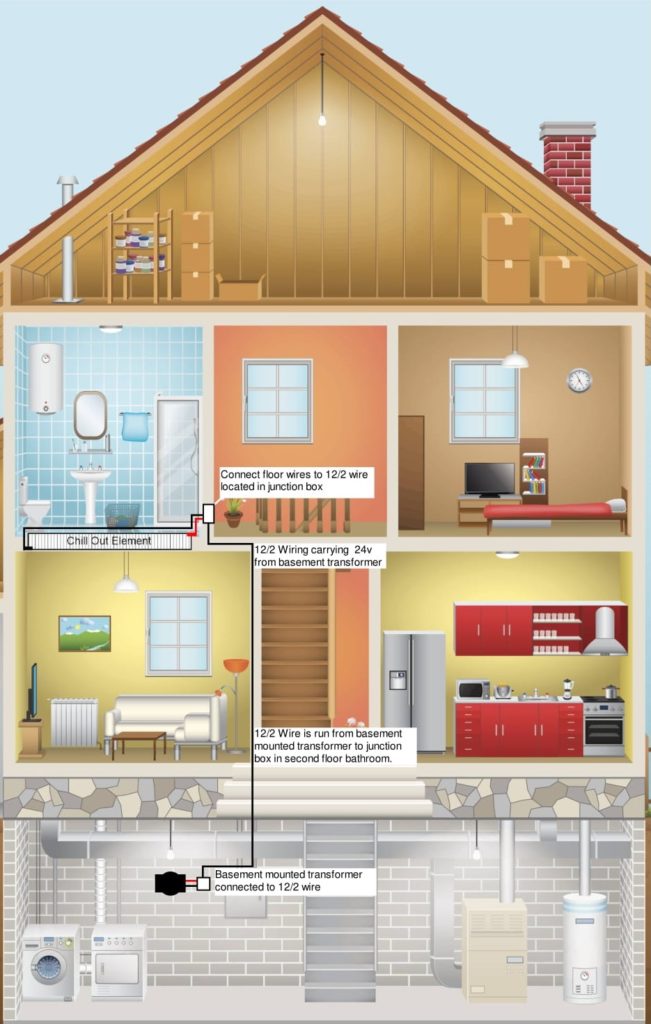
WHOLE HOUSE HEATING